Whether you are planning to record, mix or master, setting up a home studio definitely takes some thought. I would like to provide you with a brief overview of some the essential pieces of kit to help you get going with your home studio.
*PREFACE: I’m making the assumption that you already have a computer with some form of basic audio interface to begin with!
-
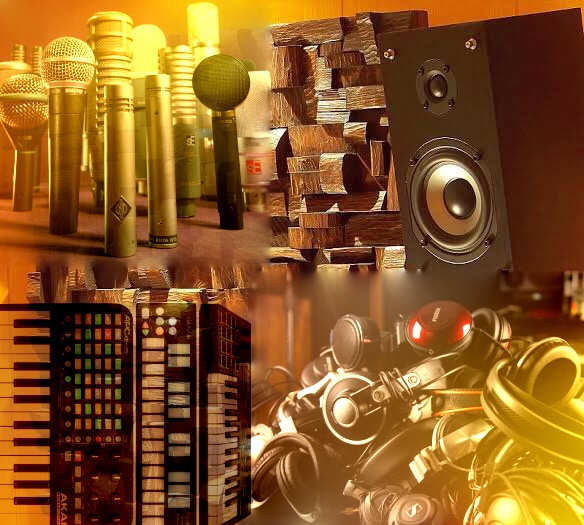
ACOUSTIC TREATMENT
I must admit that early in my career, I was of the opinion that acoustic treatment is completely unnecessary. It wasn’t until I delved into the world of acoustics and engaging a professional to assist in room analysis that my opinion began to sway. Believe it or not, even a small amount of strategically placed acoustic treatment can make a remarkable difference. The shape and furnishings of your room will largely determine the approach for treatment. Bass treatment is often an important place to start, as it usually presents the biggest challenge. As a minimum, look into some bass traps which will assist in absorbing the low-end frequencies to help reduce the risk of phase cancellation and dead spots in the room. If your room is decked out with floorboards or tiled floors, you may have problems with inconsistent high frequencies and will need to look into other forms of acoustic diffusion and absorption. Whilst there are room analysis kits you can buy that will alter the way your studio monitors playback the sound, it’s important to assess the room first prior to setting up your equipment. This will be a far better long term solution and will reduce the need for compensating with software and other tools.
-
STUDIO MONITORS
Studio monitors (or speakers), they are your ears to the music and it’s advisable to choose carefully! I recommend taking into consideration the size of your room before deciding on the size of the monitors you choose. For example, if you have a relatively small room and intend on using large speakers, the more you turn up those speakers, the more your room will become a factor. Sound needs to escape or be absorbed and you will have problems with frequencies bouncing around all over the place and you will continually have inaccurate representation of sound.
A good idea is to visit a music retailer that specializes in studio equipment, they often have a room dedicated to studio monitors and you can then hook up your smart phone to the desk which should be set up in a way that allows you to switch between the different speakers. I then suggest playing some music that you know really well and switching between the speakers to decide on which one will be the best fit for your home studio. It’s also advisable to decide on the size of the speaker that you intend to purchase before making any selections. A good studio speaker should give a fairly flat response and should not be particularly hyped in any frequency range.
-
MICROPHONES
Depending on what type of studio you’re planning to set up at home, you probably will need a couple of microphones to get started. A good dynamic microphone is an excellent place to start. Dynamic microphones are designed to absorb high SPL (or sound pressure levels). An example of this type of microphone, and one that features quite prominently in all recording studios, is the famous SM 57. I have a few of these and they are great on drums (snare drums specifically), guitar cabs and also great for loud/heavy vocalists.
If you’re planning to record acoustic guitars and super-detailed vocals, you should look into obtaining a condenser microphone. Condensers are perfect for clarity and detail, however they can become quite pricey, so I suggest deciding on your budget first before you start shopping around. You needn’t purchase a top of the range microphone if you’re just getting started, there are numerous cost effect options currently available.
-
HEADPHONES
Headphones are a very handy addition to any home studio, they are particularly useful if you are working in a less-than-ideal small space or if you have noise level restraints. I personally use headphones during recording and tracking, for this aspect of production I advise looking at a set of closed-back headphones. These will block out exterior noise and are perfect for preventing microphone bleed onto your recording.
Alternatively, you also have the option of open-backed headphones, which offer a wider, more detailed frequency response. They are more suited to mixing or post production. I will usually only use them for referencing in small doses or to pick up very faint hiss or noise on a recording that sometimes can get missed via listening on speakers, purely due to the volume and proximity. Detailed headphones will help pick up those areas that can occasionally get missed. I wouldn’t recommend headphones as a solution for mastering, however if you’re just getting started in your home studio, this should not be a major focus for you.
-
MIDI CONTROLLERS
A very common addition to all levels of studios these days! A midi controller is simply a device used to trigger software-based or VST instruments in your DAW. They have become essential creative tools and can vary from a very small keyboard with only a few keys, to a full blow 88 key piano style midi controller. They are very flexible in that you can use them to not only play keyboard or piano, but to trigger and build drum samples/performances. You may also have seen the MPC style midi controllers which look like a series of flashing coloured pads. These are great for tracking and building beats. The options are endless with available midi controllers currently, so certainly do some research and find one that best suits your needs.
I hope this has given you a useful overview of getting started in your own home studio. As always, there are no fixed rules, it’s more about finding those elements that suit your goals and building a creative space that you can enjoy and build upon in time! I wish you all the best with your studio setup and creative endeavours!
Until next time,
Mike